Hi everyone!

As part of my photography course, I have to track my development on a blog. The posts from September 2011 until January 2012 are part of a module called Project Management, for which I was required to work in a group of eight students to create an exhibition. The blog followed every step we took in order to create a successful gallery. The blog posts starting from September 2012 follow my final year on the course. I'll be documenting my research and analysis of my final year projects, as well as include notes of my Professional Practice unit - which prepares us for a range of post graduate options. Finally it also looks at a project called New Creatives, where I'll be working alongside an artists to help college students get more involved with art.
Showing posts with label Large Format. Show all posts

Monday, April 15, 2013

7591 Miles Finals!!

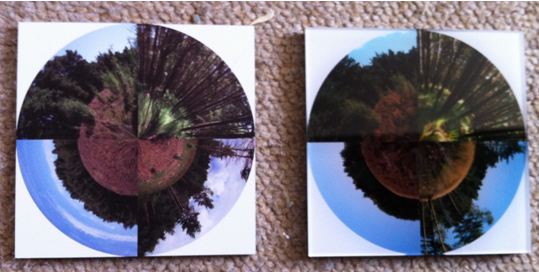
Today I went to Brighton to pick up my other two final prints for the Eldon exhibition. It feels like the millionth time I've gone to The Vault, but they're lovely and have done a fantastic job with all of my prints. The photo to the right are all three of them. They literally look beautiful. The colours are so bright and having them printed shows so much more detail than when I see them on my screen. The orange and the green in the third photo are so vibrant which relates back to the bold red in the first photo.
 The photo to the left is just a detail shot of the mounting and the paper. It's printed on matt paper and has a seal over it which looks really nice and feels smooth too. I think it's fingerprint proof, but I'm not 100% sure. The diabond mounting is very light and sturdy. I can't wait to put these photos up in the Eldon exhibition alongside my Succession photograph.

This might sound a bit cheesy, but I'm so proud of myself for finishing these two projects. Both of them used large format film, something I never thought I'd ever use, let alone enjoy! I also started playing around in the film-making world by creating time lapse videos, which is something I'm hoping to continue. Both of the final projects are beautifully presented. The Succession photo looks a million times better in its frame, and these three 7591 Miles photos also look a lot more impressive printed and mounted.


Saturday, April 6, 2013

122x54cm Canvas

My boyfriend's dad loved my 7591 Miles photos so much that we wanted to have a canvas made with all three photos on it! He had quite specific sizing for it, so I first created the canvas in photoshop to get all the measurements right. It ended up being 122x54 cm. There is a 5cm border around the photos and 2.5cm between each photo.
I got it printed at The Vault in Brighton, who I have been visiting A LOT recently. They first developed my 5x4 film, I then got my A2 print printed and mounted, I then picked it up, and today I picked up the canvas. I'll have to go again next week to pick up my other two A2 photos in the series..... Luckily I really like Brighton.


The photo above is what it looks like all together. The photo is quite dark so it doesn't show off the colours very well. It's so vibrant!! The red in the first photo really stands out and the green in the third photo looks incredibly. I'm amazed by the quality of the print, as I wasn't sure how it would look. The thick white border around the photo looks great too, it makes the colours pop even more.

Personally, I prefer having each of the photos printed individually, but I think they look fantastic printed like this too. To the left is a little detail shot of the canvas. I love it.

Like I said earlier, I will be going back to Brighton next week at some point (and do a little bit of shopping...) to get my other two photos printed and mounted. I received an email back from my lecturer saying that I will definitely have both Succession and 7591 Miles project presented at the Eldon show. The exact words were "Yes we will make the room", so that is very exciting.

Other than that, it looks like spring has finally arrived in Portsmouth! It's beautiful outside and when you stand in the sun it actually feels like I only need to wear 3 layers instead of 4! In Brighton it's still wintery and gloomy though.

Saturday, March 23, 2013

Framing/Presenting

After a bit of a stressy start of the day, thanks to the snow, I managed to pick up all my finals! First we went to the framing shop in Woking where I got my Succession photo framed. As mentioned in a previous post, I wanted to have a white frame, not too thick of overpowering, and a circular mount so it wouldn't be too layered. I wasn't too sure about the circular mount, but it looks amazing! In fact, it doesn't actually look like it has a mount, which is good, because nothing distracts you from the photo itself.


The top right and the middle left photo are both of the succession photo. You can't see the photo itself very well because of all the lights. I'm so so so happy with the white frame, I think if it was a black frame the photo would have looked a lot smaller and enclosed and the frame would be a main focus point. The glass looks beautiful as well. It makes the photo look very expensive (which it is...) and the glossiness of it makes the photo look more 3 dimensional.

The photo to the left is just a close up of the mount and the frame. It looks beautiful. Unfortunately I could only see the photo for a few minutes before it got wrapped up and put in the back of the car.


We then drove to Brighton to pick up my A2 photo for my motion blur project. I should really start to refer to it as 7591 Miles as it sounds so much more professional. Anyway, this also looks fantastic!! I printed it on matt paper so it wouldn't look like one giant mirror and it's mounted on diabond. The mounting is literally gorgeous. I'm so happy with it!! Diabond is basically the same as aluminium mounting, but a lot lighter in weight.

I can't really find the right words to describe it all, because both of these projects are the most professionally presented work I've every created. My Succession photo will be up in the Eldon exhibition in May/June, 7591 Miles will be handed in as my final for this project.

Friday, March 15, 2013

Title


Thinking of a title is probably the hardest part of the whole project. I don’t want anything cheesy or obvious, but I don’t want something that sounds silly or too abstract. When seeing the title, I want people to start to understand the work, but not completely give it away.
I’ve been thinking about a title for a long time, but it wasn’t until the group tutorial recently that we got the ball rolling. Some things that were suggested were “moving on” or “immigration” or simply “movement”. It seemed to simple and rather obvious. I don’t want the title to ruin the whole piece!
Then Dan (a course mate) thought of the idea of adding up all the miles I’ve travelled together and have that be the title. I thought it was a fantastic idea!! It shows the distance I’ve travelled, without using obvious words.

I started to think about whether to include every single move, or just the out of country moves.
Moves:
1.      Within The Netherlands
2.      From Netherlands to America
3.      From America to Netherlands
4.      From Netherlands to UK
5.      Within the UK
6.      Within the UK
I don’t think the moves within the same country are as important as that happens a lot more. The 3 photos also indicate the three countries where I have lived, thus it would be more appropriate to only add the distances of the moves abroad, to The Netherlands to America, America to The Netherlands and The Netherlands to England.
I used the following website to find out the distance as google maps wouldn’t work as it was an overseas action.


I could only get approximate locations so that’s what I did first:
Rotterdam, The Netherlands – Newark, New Jersey: 3639.962 Miles
Newark, New Jersey – Rotterdam, The Netherlands: 3629.962 Miles
Rotterdam, The Netherlands – London, UK: 198.990 Miles
= 7478.914
I wanted to be more specific so I used Google Maps to determine the exact miles between where I actually lived and the approximate location:
Nieuwerkerk a/d IJssel – Rotterdam: 11.3 Miles
Newark – Upper Saddle River: 28.3 Miles
London – Gerrards Cross: 22.0 Miles
So all together the distance would be:
First Move: 11.3+3639.962+28.3 = 3679.562
Second Move: 28.3+3639.962+11.3 = 3679.562
Third Move: 11.3+198.990+22.0 = 232.29

Altogether:
7591 Miles

Printing and Mounting


Hi Elaine

As explained re telephone conversation. The original print supplied was made as a result of scanning the negative and outputting the image via a digital machine onto photographic paper.
As we were instructed to produce a hand print we were unable to match the supplied print as the colours and contrast on this type of digital print are greatly enhanced by the machine used.

I will return a test strip with your negative and sample print to show you the problems we encountered.

Bryan O'Leary


Unfortunately I couldn't get my image handprinted at the Artful Dodgers as somehow the negative was scanned wrong and the colours were changed. These are two photos to show the difference between the negative and the scan. I am not sure how this massive difference happened, as I scanned them in properly (choosing the right film, not editing etc). The difference between the images is that the scan has come out very red – something I love about the photo – whereas the hand print has more realistic colours to it – a browny grey.

After having seen the hand print, I have decided to stick with how I scanned in the photo. Although the colours in the hand print are more realistic to what I took a photo of, the redness of the photo is partially why I love it. I think it also better to stick with the scan as it fits in the with the sequence of the three photos and finally I feel it better portrays my concept. It’s about confusion and beauty. The colours from the hand print make it very obvious as to what you’re looking at. The redness makes it more abstract and confusing, but also more beautiful and special.

This is why I have decided to stick with the scanned image rather than the hand print. I do not want to sacrifice the outcome of my photo if the only reason is for it to be hand printed. 

I went to The Vault in Brighton today to get my scanned images printed. As explained earlier, I wanted to stick to my scanned image rather than getting it hand printed. I decided to get it printed A2, mainly as that’s all I can afford at the moment. It will come to £32, although the mounting will be another £45. I’m very excited to see the outcome of it. I was shown a different photo mounted on Diabond and it looks fantastic and incredibly professional.
I am only getting the red motion blur image printed A2 and mounted, and the other two photos in the series will be A3. Luckily I only need to have one image professionally presented and mounted, and the other two can be a smaller size (although still professionally done but not mounted). 

Thursday, March 14, 2013

Succession Framing

Because I’m going to be presenting my Succession project for the Eldon show, I need to get that professionally presented. I had mounted it on thin mount board as that is all I could afford, but with the help of my parents (and because they want to hang it up in their house) we decided to get it professionally framed. We went to a framing shop in Woking to see what they could offer. Basically what’s going to happen is it’s going to get a white frame, as I didn’t want it to take away from the photo itself, and it’s going to have a circular window mount, so it doesn’t look too layered (first the white border of the photo, then the window mount and then the frame). Finally, it’ll have a glass front. It’ll be done in a week or so, but unfortunately I won’t be going home anytime soon so won’t see it for a while!! 

Friday, March 1, 2013

February 2013

Last month I created a video of all the things my boyfriend and I have been up to in January. This started out because of the idea we're moving to Australia in September and want to do as many things as we can while we're in England. Although we haven't done as much as last month, I created another short video about February!
http://youtu.be/q6BtKr06yTs
I really like creating these videos as it's a great way to remember this year. It'll be a pretty crazy one: England, The Netherlands, France, Belgium, Germany, Dubai, Singapore, Australia..... By the end of this year we'll have an amazing video filled with memories.

Large Format Shoot with Lauren Whatling

On the 8th of February I assisted one of my classmates with her Large Format photoshoot. She had never used the 5x4 camera before, and since I love it so much and can't afford to buy more film, is was a great opportunity for the both of us to work together. We went to her grandparents' house in Southsea as her project revolves around their lives. I took a time lapse of shoot:

http://www.youtube.com/watch?v=fl9kHM6tMmg

It clearly shows how much time it takes in order to take one photo! There was so much preparation involved: getting the camera set up, getting it in focus, light meter reading, waiting for a cloud to pass by, take another light meter reading, record what the readings are, take a photo of what you're taking a photo of, and then of course the process of taking the actual photo.

The photos are uploaded on Lauren's photography page, in the album named: "Large format Images Final Uni Project".
http://www.facebook.com/LaurenWhatlingPhotography?fref=ts
http://laurenwhatling.wix.com/laurenwhatlingphotography

Artful Dodgers

Today I went up to London to go to the Artful Dodgers. It was at Chancery Lane and definitely not what I was expecting... I had to get buzzed into the building and walk down to the basement, getting a bit lost in the basement! Anyway, you enter Artful Dodgers and it's just one room filled with prints everywhere! It was great to see the other people's work and the scale of everything! I will be getting the photo to the left printed A2 sized (20x24 inches) on matt paper. They will post it to me in a huge tube on Monday the 11th and include all the test prints. I've very excited to see how it's going to turn out!!

The reason I went to Artful Dodgers is because they specialise in hand printed images from the dark room. According to my lecturers they will look a lot better and will have a lot more depth and detail to them. Having them hand printed will also mean that I'm not making use of any digital technology, they are taken in an analogue style and will also be printed that way.

When I get my photo back from the Artful Dodgers, I will go back to The Vault in Brighton to get it mounted on Diabond (similar to aluminium). When I got my negatives developed there, I had a chat with one of the guys there about mounting options and he showed me what diabond is and how it would look. I thought it looked fantastic, so I'll be getting that done for my final. Hopefully I can get it all done in time for the "Crit" - our little Eldon exhibition for everyone on the course - but with my shifts at Subway, New Creatives commitments, my dissertation hand in and all my lectures, that might be a bit unrealistic. Luckily our final deadline is after the Easter holiday.

On Wednesday 6th I'll be helping up at Aspex gallery to set up the show and hang up the work. I'll be creating a time lapse video of this which I will exhibit in Aspex gallery.

Saturday, February 2, 2013

Comparison


I'm happy with the middle and the right image but am unsure which one to use for the first one. Both images are quite similar in colours so they both fit nicely with the other two images. The top photo is a bit more obvious, whereas the bottom one is completely obscure and unrecognisable. In the top photo, the trees go to the bottom of each of the photos, however in the second sequence the bottom of the photo is very dark and doesn't have as much detail.

If I go for the first sequence of photos, the first and third are quite obvious as to what the photo could be of, however in the second sequence, only the third photo is obvious. I think the next step is to get the photos printed and see what they look like in real life, rather than a screen!

Friday, February 1, 2013

Large Format Contact Sheet

These are all the images I took on my large format shoot. The three images that aren't moved are different techniques. The middle one in the top row is just a straight picture of the landscape, the right photo on the top row is a technique called tilt shift. I created this by keeping the back of the camera straight, and tilting the front part of the camera (with the lens) slightly up. The photo is blurry at the top, in focus in the middle, and blurry at the bottom. The right photo on the bottom row is also tilt shift, but slightly different. This photo is blurry on the left, in focus in the centre, and blurry to the right. I created this by, again, having the back straight, but the front of the camera is tilted left to right. I'm happy and relieved that all the motion blur images came out with the motion blur effect. The first image is very dark, but has the most movement out of all of them. The first photo on the middle row is definitely my favourite. The other two on the middle row are quite similar, although the third one shows the most resemblance to a real landscape photo. Unfortunately the middle bottom photo messed up, but that's just 1 out of 9!

Large Format Scans

Yesterday afternoon I spent an hour scanning my large format images and I'm so happy with how they came out! The colours look beautiful and very different in each of the photos. The photo above shows three of my favourite images. The first one is the most obvious as you can identify the most features, however the colours are so bright that it returns to the abstraction. The middle photo has completely different colours and is probably my favourite out of the three. There is no indication of what the photo could be of. The third photo has the colours an ordinary landscape photo would have, but is blurred in such a way that it's the most like a painting. The three of them look so different from one another, and that's why they work as a set.

Tuesday, January 29, 2013

Updates

This week has been pretty crazy. Lots of hours at Subway, the studio, large format shoot, time lapse shoot, research, practical work, trying to find a place to get my work developed, more hours at Subway, lots of train journeys, tutorials etc etc etc. I'm exhausted.

First of all, I created a motion blur time lapse, which seemed impossible at first, then ended up being really easy, but then actually turned out was pretty hard. I'm not completely happy with it, and will definitely need some editing, but here is a link: http://www.youtube.com/watch?v=FhCfJ67C84k. Next time I'm in the Woking area, I'll try this again, but get a more sturdy tripod. The reason the time lapse is a bit all over the place is because while moving my camera up and down, the whole tripod started bouncing up and down too. A sturdier tripod will mean straighter lines, which is what I want to go for.

Secondly, I had my large format shoot, which I already wrote about. The shoot itself was great and I do still love large format, however it's all the stuff you have to do afterwards that's frustrating. Such as the developing and scanning. It wouldn't be too bad, if the university colour processor was working, but unfortunately that's been broken for about 2 months and is currently in Germany.. After a lot of searching/panicking I messaged Fergus Heron to ask where he gets his film processed. He told me about this little place in Brighton where they process the film for £2.50. I phoned them up to see how long it takes to process and they told me 2 hours. The plan was to go to Brighton at 9.33 (be there at 10.45) get to "The Vault" (15 min walk) and get it processed (2 hours - 11.00-13.00), but somehow be back in portsmouth at 14.30 so I could go to work..... I asked whether they could have it finished any quicker and they could! They did it for me in an hour and 15 minutes which left me plenty of time to catch my 13.00 train to be back at 14.15. Phew.

I've also booked the scanner for Thursday afternoon so I can really see how all my images have turned out, but right now this'll have to do!

Finally, I got my marks back for my first semester project (the succession circle) and it's a first!!! Very exciting and an excellent start to the third year. Hopefully all my marks will be this good and I'll pass with flying colours! I also had my dissertation feedback tutorial which was great as well. My tutor explained to me that my content was fine and it's well written, the only criticism is that some bits are too descriptive and others need more analysis. Other than that it's just little bits and pieces that can easily get fixed. She said if the dissertation was marked, it would probably be around a 2:1! My hard work is definitely paying off..


Saturday, January 26, 2013

The Kindness of Strangers

While shooting in Horsell Common today, a dogwalker came up to me and was very interested in the large format camera. We had a little chat and he told me he also had a large format camera, which was about 100 years old! He seemed very impressed with the one from the University and also liked the sound of my project. It was nice to have a chat with someone about my project and who also had a passion for the large format camera.

A little bit later we saw him approaching us again, but this time he had a camera with him instead. He asked me if I was interested in 35mm photography as well, and when I answered yes he offered to give me his Nikon 35mm film camera and "a box with a few other things". I was literally overjoyed! It was such a nice camera with a great lens. We came over to his house where he had laid out all the gear (Photo above). It wasn't "a few other things" he had everything! Including a second lens, a whole range of filters, a flashgun, a second film camera, a bag, a roll of film, various clearers, etc. It was incredible, and he gave it all away for free! He also showed me his large format camera, which was larger than the 5x4, and a 35mm Leica camera. He explained he used to collect cameras and that's why he had such a nice set!

I'm so thankful for all the gear he gave me, I've already been playing around with the camera and it's fantastic!! Expect to see a whole load of film shots over the next couple of months.

Large Format Shoot


 I love large format, so when Daniel and Judy mentioned I should try the motion blur images with the large format, I was up for the challenge. I shot on the same film as last time, 160 ISO Kodak Professional, and bought a pack of 10 photos. Because motion blur is so extremely experimental, I have no idea whether the images have turned out nice or not. It’ll be the most frightening moment to get the photos back!

I shot the photos on the 26th of January 2013 starting at about 10am. I shot the photos in Horsell Common. I tried out a bit of everything, different shutter speeds and apertures, quick and slow movement, different locations, lighting etc.
The first shot was taking in quite a messy part of the woodland, the birch and pine trees were scattered all around and it was quite dark. The main colours were dark brown and a copper brown. There were blue skies. I used the lightmeter and got a reading of 2 seconds and an aperture of 64. Since the field camera doesn’t have a shutter speed longer than 1 second I had to use bulb mode, my handy assistant helped out with the process. While holding down the shutter for 2 seconds, I’d move the front part of the camera (with the lens) up and down at a certain speed. For this particular images, I moved the camera in long quick movements. 

I chose the second location because it was very dark and dense. As you can see from the photo to the left, the image is very dark, and the main colour would be a very dark brown, as well as a bit of dark green on the bottom of the frame. I used a shutter speed of 8 seconds, so there will be a whole lot of movement in this photo.

Again, in quite a dense area, however for this photo I faced against the sun. This way, the main colour will be white, with dark straight lines (the trees) standing out. The three photos so far have had very different colours and settings, meaning that (hopefully) the images will be very different from one another.


The two images left and right are taken in exactly the same location, but have two different meter readings. This is because I loved the way the still photo looked through the camera and thus wanted to take a photo without the movement. The bottom light meter reading shows a shutter speed of 2 seconds and an aperture of 22, again very different from the other photos. This shot will mainly have medium browns and a bit of dark green. But what will make this photo stand out is the sunlight hitting the trucks and branches of the tree. It will create interesting shapes in the photo. 

Again, the two images to the left and right are taken in the same location but have different meter readings. One is a movement shot and the other is a straight shot. The main colour is this photo will be green, as there is a lot of shrubbery towards the bottom of the photo. The sun is still hitting the trees very nicely, which will hopefully create interesting shapes. The long exposure is 4 seconds at 32 and the still is ¼ seconds at 11.
I have never had the camera point this way, so the focus was incredibly interesting (blurry at the top, then in focus, blurry at the bottom).


One of the most popular photos that I showed in the tutorial was of the sky, no one could identify what it was. Therefore, I wanted to take another shot similar to that. Facing the large format camera up was quite difficult, and trying to view the image was even harder! The main colours in this photo will be blue and green, as the tops of the pine trees had this beautiful light green which was just hit by the sun, and the sky was a nice even blue.
Hopefully all the images have turned out nicely...


Friday, January 11, 2013

Fergus Heron

On the 2nd of January 2013 I assisted Fergus Heron on a Photoshoot. It was a great opportunity to see how a professional photographer goes about doing his work. We went to Horsell Common at about 11 in the morning and finished close to 2. Heron originally planned to take one photo, but ended up taking two.

Before Heron starts shooting with his 5x4 Large Format camera, he needs to decide on what he wants to photograph. He spends quite a bit of time walking around Horsell Common using his iphone or a small compact camera to sketch out possible images. He uses this as his practical side of the research. Instead of just taking one quick photo, he takes about 5 to look at different styles of composition. When he's found the perfect shot, he will take his 5x4 camera. When I went out with Heron, he wanted to replicate a photo he took on his iphone back in March. 

When we got to Horsell Common I realised how much gear he actually has. He had one ladder, a huge tripod bag, a rucksack for his large format camera and a waterproof case where he keeps lenses and other important accessories. Heron started to unpack his tripod and I was literally shocked at how large the tripod was. It went up so high and that's why the ladder was needed - to be able to look in the back of the camera. The reason why Heron had such a high tripod was because in order to get the whole image in focus, it's best to get to higher up. It also meant that he would have a further vantage point for his photos. 

After setting up the camera to get an almost identical picture to his original photo he explained to me some steps he took to get the perfect shot. He explained that his aperture is mainly in the middle, so about 16. He used the metaphor of a cars engine, cars work best when you drive at a constant middle speed, and it's the same with large format photography. Another reason was that if the aperture is too low, you could potentially see a darker outline on the photos. Heron talked in great detail about his composition and how it's important to have something in the bottom corner stand out as well as a top corner, to create a direction of viewing. 

He took quite a few lightmeter readings but it took quite a bit of patience as Horsell Common is a very popular dog walking area. Thus, he had to take some more lightmeter readings. He talked me though all the steps of large format photography, and said that one of the most important things is to check whether the shutter is closed when you put the film in, and that you don't have the shutter release wire in the way when shoot! 

After the first photo, Fergus Heron decided to take another photograph as he'd been wanting to take a photo in a second location for a while. We set up the camera in the second location, but since we were already elevated, he didn't have to have the tripod as high. The composition was incredibly important and it took quite a while to get something he wanted. The iphone or compact camera screen obviously have a different ration than the 5x4 camera, so the composition needs readjusting. He explained it's important to always make sure that you can see the bottoms of the trees, as it looks very odd when you have a "floating" tree, so to say. 

It was an incredible experience to work with Fergus Heron. when he finished shooting he asked my about my projects and gave me some advice on the people to look into. He will be sending me digital copies of the two images that he took! Working with his has made me feel so nostalgic for large format photography! 

Monday, December 3, 2012

80x80cm Print

I originally wanted to print my picture acrylic mounted, however after quite a few tutorials Judy and Daniel both said that they'd prefer it if the picture was printed off massively. Having already spent lots and lots of money on printing pictures, I wanted to look for somewhere affordable. I came across Jessops photo printing service where they print XXL posters in a square format and decided to go for the 80x80cm print.
I picked it up from the shop in the biggest tube I've ever seen, and when I got home it looked fantastic!! I'm really happy with the outcome and definitely prefer it being this size. You can really see all the detail in each of the four photos. It's printed on a semi gloss paper, as Daniel mentioned he thought the glossy print I printed was too glossy and the matt didn't look as good. 
The next issue is.... how will I present it? We always have to present our work in a professional manner, so just having this print hanging on the wall wouldn't give me a very good mark. I spoke to Judy he mentioned all these really expensive things, that would look great, but with the size of my print would be over £100. I did some of my own research and found a company that sold massive pieces of foam board. I double checked the size of the print, as on the Jessops website it warned you that the print might come out slightly bigger, and good thing I did, because it's actually about 82x82cm! I ordered a foamboard and with their special cutting option asked for it to be cut 83x83 (so there is room for mistakes). It should arrive tomorrow morning! 

Tuesday, November 20, 2012

Twisting


While I was asking people to comment on which image they prefer on Facebook, someone suggested that maybe I should turn the image so that the lines aren’t horizontal and vertical. I decided to test this out, as it’s something I hadn’t thought of before. As the image above shows, I copied that first layer (the original image) four times and twisted the image so that each different photo is up. I still had to bear in mind the sequencing of the image. Although it’s a continuous cycle and any image could come first, I didn’t feel like the overgrown stage could go up as that was really a middle stage, whereas the other three could be a starting point. I didn’t like having the trees pointing down or up so that only left me with one image: having the clearing up. I definitely like the look of it. I am so used to seeing the image with the horizontal and vertical lines that it’s quite weird to see it tilted, but I do prefer it looking like this.

Sunday, November 11, 2012

Testing Brightness


Getting the brightness right of the photos has been a bit of a pain. The photos are coming out slightly dark when I print them myself, but nowhere near as dark as other companies have printed them. Because I want my final to be acrylic mounted I will need to get it printed somewhere. 

The photo above shows how I’ve been slightly changing the brightness in every photo. You can’t really tell a massive difference because of the quality of the photo (taken on my iphone). The largest photo is the print by photobox, and the smallest one is by white wall, the acrylic print. The rest have been tests. Nothing has come out as dark as the print from photobox, which is a bit odd, and therefore it’s hard to change the brightness as I don’t understand why the print has come out so dark in the first place.

I started off by just brightening the whole image (top left image on the sheet of 4), but it completely got rid of the colour in the sky. After than I started brightening each photo individually. I lost quite a bit of colour in the heathland and so while brightening I also added colour so that none of that detail would be lost.

The print with two images on it, is (for now) my final. The image on the left is the original (as you can see it’s not as dark as the photobox print) and the image to the right is the newly edited version. There is still enough colour in the photo, and it has also been significantly brightened. I might get some 6x4 prints from photobox in order to test whether the brightness has worked, before I think about ordering my final print.

Saturday, November 10, 2012

Acrylic vs Aluminium

 It took quite a while for the acrylic and aluminium prints to arrive, but I’m happy that I tested it before spending lots of money on getting a big print. The aluminium (left) is quite disappointing. It could be because the image is meant to be a lot larger, but it seems the quality of the photograph is horrible! The paper on which the photo is printed isn’t very nice either. The acrylic on the other hand is fantastic. The photo looks amazing, and unlike the aluminium print the quality is great too.


For my final I will definitely get the photo mounted on acrylic. The photo, again, did turn out quite dark. On my screen the photo looks fine, but everytime I get it printed it looks really dark so I’ll have to fix that before I get the final printed.