Hi everyone!

As part of my photography course, I have to track my development on a blog. The posts from September 2011 until January 2012 are part of a module called Project Management, for which I was required to work in a group of eight students to create an exhibition. The blog followed every step we took in order to create a successful gallery. The blog posts starting from September 2012 follow my final year on the course. I'll be documenting my research and analysis of my final year projects, as well as include notes of my Professional Practice unit - which prepares us for a range of post graduate options. Finally it also looks at a project called New Creatives, where I'll be working alongside an artists to help college students get more involved with art.

Tuesday, October 9, 2012

Thomas Gainsborough


Thomas Gainsborough was an English painter, specialising in portraiture and landscape. He was born in 1727 in Suffolk and studied art in London from 1740 onwards. In 1759 he moved to Bath, but fashionable society patronised him, thus he began exhibiting is paintings in London. In 1769, Gainsborough became a founding member of the Royal Academy. He finally moved to London in 1774 and painted portraits of the King and Queen. Later in his life, Gainsborough started painting landscapes and was credited as the originator of the 18th century British Landscape school. He preferred landscapes to portraits.
Painting of Cornard Wood by Thomas Gainsborough – image from www.telegraph.co.uk

At the age of thirteen, Gainsborough’s father was so impressed with his pencilling skills that he was allowed to go study art in London. In 1746, after he married, Gainsborough was mainly interested in landscape painting, however it wasn’t selling very well. Therefore, he returned to his hometown and started painting portraits.

When Gainsborough and his family moved to Bath, he studied portraits by van Dyck and was eventually able to attract fashionable clientele. He started to send his work to the Society of Arts exhibition in London in 1761. Exhibitions such as these gave him a national reputation and as a result he was invited to become one of the founding members of the Royal Academy.

When he moved to London, he continued to paint portraits of contemporary celebrities, including the Duke and Duchess of Cumberland and King George III. This gave him enough influence at the Academy for him to dictate the manner which he wished his work to be exhibited. In Gainsborough’s later year, he continued painting rather simple and ordinary landscapes.

"I'm sick of portraits, and wish very much to take my viol-da-gam and walk off to some sweet village, where I can paint landskips and enjoy the fag end of life in quietness and ease."

Gainsborough’s like for landscape paintings shows in the way he painted his portraits as he merged the figures of the portraits with the scenes behind them.

Wooded Upland Landscape, probably 1783 Oil on Canvas
"Gainsborough first saw seventeenth-century Dutch landscapes as a young apprentice in London in the early 1740s. He made a drawing after one of them, a forest scene by Jacob van Ruisdael, the Dutch artist whose work he most admired. By 1748, he had returned to his native Suffolk and was an accomplished landscape painter and draftsman. However, he was uninterested in the English tradition of topographical painting. Commissions for landscapes based on the Dutch model were few, and for his livelihood he was forced to turn to conversation pieces and portraiture. Gainsborough made his reputation as a portraitist in Bath, to which he moved in 1759, and in London, where he spent the last fourteen years of his life. His later landscapes are broadly painted and evocative. Informed by his lifelong interest in nature, they were nevertheless composed in the studio. This idyllic imaginary view and the chalk sketch on which it is based were probably made in London in 1783. The delicate washes of pastel coloring are typical." Text: http://www.metmuseum.org/toah/works-of-art/06.1279

The reason I wanted to look into Thomas Gainsborough is because a lot of landscape photography comes from paintings - that’s how this genre started out. Gainsborough’s paintings are interesting to look at because of the different shades of each colour he uses. For example, when you look at the sky in the picture above, you can see so many different shades of grey, just like you would do in a photograph. It’s painted with so much detail and so many different elements are included it looks realistic. These paintings would fall under the subject of deadpan because of the lack of emotions as well as the cloudy sky.


What I like about Gainsborough is that even though he changed to portraiture, he always kept in touch with nature and landscape. The person he painted would be surrounded by trees for example. It’s like he always knew what he wanted to do, but had to sacrifice a bit of him in order to make a living. 

The Project


I decided I should get my photos printed out to both test the quality and make it easier to find a sequence that works. I got them printed 6x4, but unfortunately the place where I got the photos printed edited the photos and completely changed the colours in the photos. It seems as though they have brightened up all of the photos and added green to others. It’s extremely disappointing because when I get my photos printed I trust them not to manipulate the images.

Anyway, aside from the different colours, it was still helpful to print them out. Seeing all the photos together made it a lot easier to decide on the order of the photos. As you can see from the image, I have a lot of woodland photographs. This is mainly because it was my favourite place to photograph. My original plan was to shoot in a deadpan style, however I love the patterns the sun creates through the trees. I only choose to print two heathland photographs, because these are the only two that I liked (so far). The bottom one is my favourite because of the repetition of the horizontal lines (the cloud, the trees and the heathland). The third row has the overgrown stage. It has quite a few photos, but I only like the fourth and the fifth one. I took these on the latest Photoshoot I’ve been on and I feel that they work the best. There is enough of a vantage point to match the rest of the photos and there is enough different between the heathland and the overgrown stage. Finally, the last row has the chopped down area, or the clearing. I quite like all three of the photos, they’re very different from each other: the top and bottom photos have a far vantage point, whereas the middle photo clearly shows the horizontal and vertical lines.

The three photos below are different sequences I could use. Succession is an endless cycle so I’m not sure where to start. The first photo would be an appropriate start because the majority of England used to be covered in heathland, then the woodland started to take over and lastly, because of the various management programs, the woodland has been chopped down. This would be a good order, but I don’t like the look of it. I don’t like how the woodland stage is in the middle; I think it would look much better with the heathland in the middle and the woodland to the side. 


The second photo starts with the cleared area, followed by the heathland, then the overgrown area and finally the woodland area. I think this looks a lot better – the sequence starts with trees (in the background) and finished with the same look. I don’t think the third photo fits in the sequence as there isn’t a far enough vantage point.

The third photo is yet again another order. This shows that the majority of England is now covered in woodland and it demonstrates how the woodland will eventually take over again. I quite like the look of this too because the two middle photographs clearly show the horizon, whereas the outer two photos have a lot more going on. The outer two photos frame the inner two.

I think my favourite order is the middle one, although I’d use a different set of photographs.  

Monday, October 8, 2012

Fergus Heron

"Fergus Heron's photography makes visible connections, discontinuities and tensions between architecture and landscape, artifice and nature, the modern and traditional. His subjects are commonly experienced places that embody real and imagined histories. Heron's working process is highly researched and involves long - term engagement with his subjects, rather than successively working from one project to the next. In his work, the photograph itself is considered as a complex image, between document and picture.

Working always with available light, Heron's photographs are absent of human activity, emphasising stillness and a sense of extended present time. Often a single photograph of each subject is made. Otherwise, where similar views are possible, photographs are made in pairs or sequences. This technique complicates the subject, and, more importantly, the process of seeing, posing questions about how elements between and within the photographs are related. Working with a view camera, Heron's work aims to decelerate and distil the process of photography, through slow picture making, and concentration upon some of its most basic principles." From http://www.fergusheron.com/


Fergus Heron is quite an obvious link to my work, mainly because he takes photographs in Horsell Common too. I have sent him an email asking whether I could send him a quick interview about this project so I have a better understanding about why he has done the project the way he has.
All of Heron’s work makes use of deadpan photography. He has 7 categories: Charles Church Houses, Forest, Shopping Centre Interiors, Motorways, Coasts, Common and Pond. For this project I will mainly research and analyse Forest and Common. Forest has photographs of Horsell Common – only the woodland – and Common is another location quite close to Horsell Common. Although it isn’t the same area or has anything to do with succession, the style of photography and how he decided to capture it will be interesting to learn about.

The text above is from Heron’s About section on his website. I found it quite interesting how he writes about “connections, discontinuities and tensions between architecture and landscape artifice and nature the modern and the traditional”. Before I started University I was interested in tension and contrast within my photographs. Since being here I have been busy trying out so many different styles of photography, I sometimes forget to backtrack to what I was initially interested in.

When Fergus Heron came in to speak to us last year I remember him explaining to us that he always used an overcast or cloudy day for his photographs. I don’t quite remember why, so I am hoping he will reply to the interview! However, I do remember him explaining to us that some of his projects take years to finish. His common project would have taken at least a year as he came back every season to take photographs of the changes in the landscape. I would love to be able to do a project that takes me a couple of years – such as this succession project. It would be fantastic if I could come back to the same location every year for 10 years and see the change the same place has made. Obviously that would be impossible to do now, but I think that might be something to consider (If I stay in England that long!) It would be a lot stronger than the project I am doing now, although I think this project will be strong if I make sure each picture is almost identical.

Just like Fergus Heron, I will be working with available light. Although Heron likes his photographs to be overcast or cloudy, I much prefer the sunlight creating intricate patterns on the trees. From the photographs I have taken so far, I prefer the photos with blue sky and the purple heather. However, as the year goes on and autumn is coming I am sure I will have to reconsider whether I want to have blue skies or cloudy skies. Having a cloudy sky, on the other hand, will add to the deadpan style of photography - emotionless and clinical. 

When looking at his Forest photographs, on first glance they look very similar, however as you look at them more closely and for longer, you start to notice all the small but complex differences. Seeing all three photos of Bracknell 2000, it shows that Heron has made sure the horizon in each photo is the same. It almost looks like a panorama.


Timetable


August
·         First week
o   Research the succession
§  What is it
§  How does it happen
·         Second week
o   Practice shoot
§  Check out the area
§  Try a few different things to see what works
·         Third week
o   Photoshoots
§  Find what stages of succession I want to photograph
§  Try a few different things to see what works
·         Fourth week
o   Photoshoots
§  Find what stages of succession I want to photograph
§  Look for specific areas of succession
§  Try a few different things to see what works

September
·         First week
o   Photoshoots
§  Get a better idea of the 4 stages
§  Try a few different things to see what works
·         Second week
o   Photoshoots
§  Specifically look for the 4 stages
§  Make sure to have a wide variety of all the stages
·         Third week
o   Analyse the photographs
·         Fourth week
o   Analyse the photographs

October
·         First week
o   Research
§  Find related photographers
§  Contact related photographers
·         Fergus Heron, Guy Moreton
·         Second week
o   Research
§  More information about succession
§  More artists research
§  Research on large format cameras
·         Third week
o   Photoshoots
§  Large format
§  Digital
§  Timelapse
·         Fourth week
o   Analysis
§  Scan large format photos and analyse
§  Timelapse work
§  Digital work
o   Meet contacted photographers

November
·         First week
o   Analyse
§  Pair images together
§  Find sequences
§  Think of how to display work
·         Second week
o   Test
§  Print test prints
·         Acrylic, Aluminium, Canvas
§  Sequences
·         Third week
o   Decide on the final presentation
o   Research galleries for presentation
·         Fourth week
o   Print the final photographs
§  Leave enough time for delayed shipping or reprinting

December
·         First week
o   Finalise
§  Presentation
§  Text
§  Order of photos
·         Second week
o   Finalise
o   Final exhibition
·         Third week
o   Make any changes if possible
o   deadline

Large Format Camera (5x4)


Today I had my large format workshop. Every lecturer I’ve spoken to about my project insisted I use a large format camera and the majority of the photographers I have looked at use it too. I guess I didn’t really have much of a choice. I was really unsure about the 5x4 camera and really wasn’t looking forward to the workshop. However, Daniel went over everything very slowly and let me try everything out so I understand how to use it. It was incredibly useful and I feel a lot better and more confident about using the large format.

Notes:
·         The first step is to take the camera out of the bag
·         Before unfolding it, put it securely on the tripod
·         There is a clip on the front of the camera, open that
·         Loosen the 3 main screws on the back
·         Raise the back of the camera up at a right angle
·         Make sure all the clips fit in the hinges (where it dips)
·         Once they are in the dips, tighten them firmly but not too tight
·         Lift the front bit up and slide the bottom towards front of the camera (to the tip)
·         Lock the front – slide the two outside bits out
·         Slot the clips in the dips again and tighten
·         Loosen the clips on the front to adjust it up so that it’s at a right angle and parallel to the back
·         When the front and the back are parallel, the image will be straight

·         You can move both the front and the back up and down, back and forth and side to side

·         When putting the lens on the camera, take the back cap off first
·         Make sure all the controls are on top
·         Slot the bottom in and then clip the top
·         Normal lens is 50mm and wide-angle lens is 90mm
·         When changing lenses you have to change the bellows

·         Put the aperture on the lowest setting so that the most light comes in
·         Open the lens using the black trigger on the left side of the lens – put it up
·         The view will be upside down

Order:
·         Shut down the lens (move trigger down)
·         Set the correct aperture
·         Set the correct shutter speed
·         Cock the trigger (this means it’s ready to shoot)
·         Double check if the lens is closed
·         Enter the card (with the negative inside)
·         Take the slide out
·         Take the photo
·         Put the slide back in the other way

·         White side up means unexposed
·         Black side up means exposed 

Loading the Film:

Film needs to be put in the card in a darkroom. The top right corner of the film has some cut outs in it and this is how you know which way to put it in the card. Make sure that the film is laid out so that the top right hand corner has the cut outs. Put the holder next to it with the slides partially out on the bottom.
In the dark, move the top bit up and carefully slide the film in. Make sure it’s in the lowest slot. When the film is in, close the slide. Do the same thing on the other side.
Also, remember that when the film is unexposed and loaded, that the white side is sticking up. If the film has been exposed, the black side should be up. 


It sounds like a lot and a bit confusing (especially when you don’t have the camera in front of you) but I think I’ll be ok.

Sunday, October 7, 2012

The Project

As you know by now, my project is about succession. I want to take a close look at how a heathland turns into a woodland over time. Over the past couple of year, volunteers in Horsell Common have chopped down areas of the woodland in order for the heathland to start growing. This is where I'll be taking my photographs. 

Succession is an incredibly long process, and unfortunately I only have 3 months to finish this project. Therefore, I'm shooting 4 stages in different location in the common. The first stage will be the clearing, so where the trees have just been chopped down. The second stage is the heathland, the third is where the trees are starting to overtake the heathland and the final stage is the woodland. 

I am photographing every stage in exactly the same style, with the horizon at the same height, same natural lighting and the same vantage point. By shooting all the photos in the same way, I'll hopefully achieve enough repetition so that it appears as though the photographs are taken in the same place over a very long space of time. 

Friday, October 5, 2012

Succession

"Bare land almost never anywhere on the planet does not stay bare for very long. Plants very quickly start to colonize the bare land and over time an entire plant community develops.
This change is directional as one community is replaced by another. Ecologists call this process succession. Succession is a natural increase in the complexity of the structure and species composition of a community over time." Environmental Systems and Societies Course Companion by Jill Rutherford. 

 I'm currently doing a project about succession - how a landscape changes of time in a natural way - and I'm specifically looking at the process of how a heathland forms into a woodland area in Horsell Common. The majority of England used to be covered with heathland, however, over time birch and pine trees started to take over. Their growth created shade which ultimately resulted in the heather dying due to lack of sunlight. 

Heathland is incredibly important for invertebrates. A lot of uncommon species live in the heather, such as the bog bush cricket, large heath butterfly, black darter dragonfly. The heath also supports rare birds such as the nightjar, and reptiles such as adder and slowworm. Without the heathland, all these species will eventually die. A large percentage of remaining European heathland is located in Britain, however since 1949, 40% of British heath has been lost by conversion to arable, or intensive grazing, afforestation, building or succession to scrub due to lack of proper management. Therefore, all over the country people are working on restoring the heathland.

The Horsell Common Preservation Society has a wide variety of volunteers who manage the common "out of respect for the wildlife living there and the general environment" (www.horsellcommon.org.uk). Horsell Common has a wonderful habitat for wildlife, and is home to Bronze Age Barrows and to a former Muslim Burial Ground. It's also the place where HG Wells' Martians landed. It has about 830 acres of green space, "maintained for the benefit of all and for the conservation of the animals and plants that live there" (www.horsellcommon.org.uk). 

The volunteers of the Preservation Society meet up one Sunday a month to help restore the heathland. They have started a 10 year project, which is funded by Natural England through conservation grants. "Heathland restoration involves the remocal of pine, oak and birch trees; the trees will be chipped and used to generate electricity at Slough Power Station ... All this work produces an environment with favourable conditions for heathland regeneration from dormant seeds." (www.horsellcommon.org.uk)

Basically, what they're doing is chopping down specific areas of the woodland. This will create an open clearing for heather seeds that have been left in the soil to start growing again. It takes about 5-6 years for the heathland to fully be formed so it's a very long process. While the heather is attempting to grow, the surrounding trees will be dropping their seeds in the cleared area too. Over time, the trees will start to take over the heathland, and the cycle will start all over again. This is what I'll be photographing over the next 3 months. 

Saturday, September 29, 2012

Portfolio Workshop One

During this workshop we had to work in groups and question everyone about what kind of photographer they want to be. This sessions is to start the process of identifying the area of professional practice you are interested in. We had to start to think about how we present ourselves and our work in relation to this identified area. Prior to the lecture we had to find two photographers we are interested in. I choose Peter Lik and Fergus Heron.

1. Describe the 2 photographers that you have brought in as examples. What is it about their work that interest you and how do they represent themselves. 
Peter Lik is my all time favourite photographer. I had never heard of him until my trip to Miami last September. My boyfriend and I went shopping on Lincoln Road Mall - and it was so incredibly hot we had to go inside somewhere and we ended up entering Peter Lik's gallery. Both of us were amazed. Lik is a landscape photographer and conducted a 5 year project travelling through America capturing all it's beauty. All of his photographs are large panoramas and incredibly colourful and dramatic. The photo to the right is a snapshot of his website. You can see the the bright colours without even having to enlarge them. The style of photography is not the only think I like about him. I want to be a travel/landscape photographer myself and that's why Peter Lik is such a massive inspiration. Peter Lik's website is quite commercial, it has a lot of his work on there, but has a shop where you can buy his work and his books. It seems like his photography isn't necessaries about the meaning behind the photographs, but more about how aesthetically pleasing it is.  

Fergus Heron is the completely opposite of Peter Lik. Heron's website shows a limited amount of work and doesn't have much information. It is a very simplistic website and not commercial whatsoever. I like Heron's work because of his deadpan style. A lot of my work has contained deadpan photography and I always end up returning to Heron's work for inspiration. Fergus Heron also has quite a bit of landscape photography, which is my favourite genre. 


2. What sort of photographer do you think you are at the moment? What do you most enjoy photographing? What do you think you're good at?
As mentioned before, I want to be a landscape/travel photographer. Since being at Uni, I've been trying out a lot of different types and styles of photography, including fine art, band photography, portraiture, architecture etc, but I still am most enthusiastic about landscape and travel photography. I'd love to travel all over the world to build up a strong portfolio, but unfortunately I don' t have enough money for that. Another type of photography I really enjoy is nature: macro photography of insects and flowers. 

3. Where would you like to see your work the future? For example, galleries, magazines, bill boards books etc.
I would love to one day have my own gallery. But before I get there I could see my work in travel related magazines or maybe the travel section of newspapers. I would also love to make my own book in the future containing a project that I have been working on for several years. 

4. How does your current portfolio relate to the answers above?
My portfolio has been through a lot of changes in the past months. I'm trying to cut down the amount of photos I'm using and make it specifically on travel and nature seeing as those are my two main interests. 

5. How does your set brief project relate to the answers above and your current portfolio?
For my set brief project I'm looking at succession in Horsell Common, so how the landscape changes over time in a natural way. Although it doesn't have anything to do with travel, it relates to landscape photography. I'm taking the photographs in a deadpan style of photography so that relates back to Fergus Heron's work. 

Lecture 1

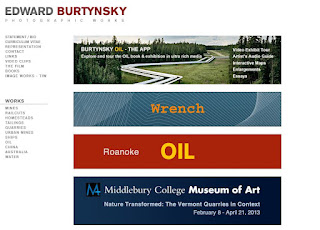
We started our first lecture looking at a few different photography websites. Daniel, my lecturer, mentioned that a lot of the photography websites nowadays are very simplistic and easy to navigate. We first looked at Edward Burtynsky (snapshot of the website to the right) . The website makes use of a very simple format. It contains all the relevant information eg a statement, his CV, how to contact him, a film he's made, books etc. The bottom section of his website shows all of his projects. When you click on one of the links under his 'work' section it opens a page with the first photo of the series and to the right a list of all the other photos. You can click on the photo and it opens in a new window to the size of your browser. This way you can look at all the detail within the photograph.

Next we looked at a website called Webber Represents. This website contains a whole range of photographers. Again, it's very simple and easy to navigate. The photo above shows the 'artist' section where you can see all the photographers on Webber Represents, and a small thumbnail showing you what type of work they do.

We specifically looked at Steve Harris. The photo to the right is the page that opens when you click on an artists' name. Again, it is incredibly simple to use. The text to the side is a little 'about' and below that are all of his projects. Daniel decided to show us Steve Harris because he has a unique way of showing his work. Instead of just having a photographic portfolio, he has also made a film, called 'gymnast' where he combines photography and film. Alongside that he also has a film about the film, showing how it was made. 


Following this, Daniel talked to us a bit more about portfolios. He explained that your portfolio shows a lot of things about the photography you enjoy doing, however, you blog shows more development of your work as well as work experience. Having the blog alongside your portfolio gives you more value as a photographer. It almost sounds like the blog is more of a CV. A lot of photographers have blogs now, and you will usually find a link on their website that redirects you to their blog. 

Lastly, we discussed the different types of portfolios: a website, a digital portfolio and a physical portfolio. When you have a website it's very easy to add new photos and make little changes. With a digital portfolio (usually saved as a PDF), it's still quite easy to change the layout or the order of your photographs, although it's more work. With a digital portfolio you can view the photos full size and you can make it interactive by adding website links. A negative about having a digital portfolio is the size of the file, you will probably not be able to email it to anyone so you'd have to use a different program such as dropbox or put it on a cd. Finally, the physical portfolio is great because you can see the quality of the photos when they are printed. However, you would have to put the photographs in sleeves so the prints don't get damaged. It's also a lot more expensive. 


Friday, September 28, 2012

Professional Practice

I'm currently in my third year at the University of Portsmouth, studying photography. I set up this blog last year as part of a module called "Project Management". For this unit a group of students and myself had to create and organise our own exhibition. Together we had to find a venue, design a logo, advertise our exhibition and much more. This blog looked closely at all the steps we had to take in order to have a successful exhibition.

This year we have to continue our blogs in a unit called "Professional Practice". This unit is all about preparing us for a range of post graduate options - whether we want to be a freelance photographer, a photographers' assistant, work for a company, be a curator etc. It will consist of lectures, workshops and visiting speakers, all of which need to be documented on our blogs. By the end of this academic year we will have to have set up our own final year exhibition as well as have an online and/or physical portfolio, and lastly have a professional practice plan of 750 words basically explaining what we want to do when we're finished with our course.

This blog will both document my journey of deciding what direction of photography I want to go into, as well as academic research into other photographers and what I've learnt in the lectures. Next week Thursday we have an alumni day where past students will come in and explain what they have been up to since graduating. Our lecturers tell us these sorts of things are incredibly important as you can establish contacts and many students go on to assist various visiting speakers. We also have a couple days for visiting speakers, although not all of them have been confirmed yet.


Monday, January 9, 2012

The Result...

Sorry for not posting for a while, I hope everyone has had a lovely holiday and a great new year. When the exhibition finished we had to do a few finishing touches such as cover up the holes and repaint the walls. Joe, the owner, luckily had some paint left over so we were able to use his paint to cover the walls. We also split up all the money between us, including the £60 deposit we had £121.06 remaining which means £13.45 each. 
We also had enough time to look through the guest book and read all the messages people left behind. Here are a few: 
"The layout and use of the space is good. Beautiful pictures. Well done."
"Excellent Exhibition guys! We can see you've worked hard, your work is amazing. Hope it goes well."
"Congratulations to you all, we enjoyed your different interpretations. Best of luck for the future."
"Very interesting to see the different takes on the same subject."
"You have certainly made the most of the limited space. Some really interesting and well presented work. Very impressed with the professional looking concept poster. Well done everybody, you can be very proud of the achievement."
"Superb quality of work with great thought provoking images. All of the subjects are so different but they go very well together. Highly impressive selection of work. Well done."
"I really liked the exhibition. It is a nice cosy place which creates an intimate atmosphere. The nine mini exhibitions all have their own style, which keeps it interesting. I like that some pictures are small and others quite big. My favourite is Elaine's work, closely followed by Adam's and Hannah's. Looking forward to seeing more of your work!" 
Joe also left a message for us saying "Superb display of impressive works. All students work presents really well in the compact space available. The content of work is fascinating. drawing the viewer into a haze of visual indulgence. Soothing the soul and eviscerating the senses. Bloody nice people too! Don't be strangers!"  

The skills I learned from curating this exhibition has given me the confidence to approach the manager of the Fawcett Inn and ask whether I could hang up some work in the pub. The pub has been completely refurbished and they are trying to turn it into a student pub. This is the same pub where we had our pub quiz so I thought it would be a great opportunity for both me and them to hang up some work. After they looked at my portfolio they were very optimistic and offered me some space in the pub. I have been in contact with the pub as to how I should display my work and the pricing of the images. Hopefully it will all be set up by the end of January. Because I took that step forward and asked if I could display my photos, the manager started telling me she had photos taken of her daughter and her dog every year, but her usual photographer couldn't do it any more. She asked me whether I wanted to take some photographs of her child and asked me for a price! Before this unit, I never really thought about having my own gallery or a space to display my work, but I have changed my mind and in the future I am hoping to have my own gallery. 

Sunday, December 11, 2011

Final day...

The third and final was another big success. Since we were open for longer and it was weekend, a lot more people were able to come to the exhibition. My family came and had a look through all of the work and wrote lovely messages in the guest book. Everyone got lots of compliments but the main thing that everyone wrote and spoke about was the variety of work - although everyone was given the same brief with the same theme, the work showed great diversity. 

The exhibition has come to an end now but it's been a lot of fun. We all had our ups and downs and worries but everything came together brilliantly. It was a very successful couple of days and only got compliments. I think the project has been a great learning experience, it has given me the confidence to one day have my own gallery. It taught us how to all collaborate together in order to create a fantastic exhibition and I wouldn't have been able to do it without my lovely Artea photography team. We also wouldn't have had been able to have such a successful exhibition without the tea ladies at "Mad About the Cake" so a big thanks goes out to them. 

Also a big thanks for all the people that showed up at our exhibition and to anyone else that has helped us along the way! 

Saturday, December 10, 2011

Second day...

The second day was even better than the first. We were open from 1pm until 6pm, similar to the first day, and people already started to show up before we opened! It was lovely to see how many people came to the exhibition to admire our work. Most of the people that came were friends and family, although there were quite a few strangers that had come in to the exhibition (meaning the leaflets did pay off!). It turned out to be a fantastic day as I managed to sell one of my photos! Someone had come in and looked through my portfolio and decided he wanted to get one of my photos printed A4 and mounted. Someone also came up to me and asked my where I had gotten my portfolio from as she loved the professional finish of it. Later that day the people who let me take photos of their house came to the exhibition. It was wonderful to see them again and they loved the work. They noticed some details about their house that they had never seen before (the repetition of arches - even in the wine cellar) and they joked how their house "was actually very nice"! They told me some more history of the Nunnery and took some photographs of me beside my work. Overall it was another very successful day and I hope that the last day will be just as good. We will be open a couple hours longer to get some more people to come.